


Navigation
Do you ride your electric bike frequently and want to ensure it stays in the best shape? You'll need to have a basic understanding of bikes/e-bikes and how they work so that you can make any necessary repairs or adjustments.
Electric bikes, or e-bikes, are becoming increasingly popular due to their affordability, convenience and environmental friendliness. However, like any other vehicle, they require regular maintenance to stay operational.
Knowing how to fix your electric bike can help save time and money. You can easily take care of most minor repairs with just a few tools and supplies. This guide will cover the basics of electric bike repair — from inspecting batteries and motors to fixing brakes and changing tyres.
How to Fix an Inoperative Electric Bike
Repairing an inoperative ebike is straightforward if you follow our instructions closely. Remember, for these steps, you'll need a wrench, an Allen key, a screwdriver (delivered within the package when you brought ESKUTE e-bikes), and tyre levers (you might need only when your tyre should be changed). So, without further ado, let's dive right in!
Determine the problem
The first step to fixing your electric bike is troubleshooting to discover the exact issue. Once you discover the problem, which is usually caused by damaged or malfunctioning parts, you'll need to fix the bike.
We'll extensively discuss how to repair the main components of your electric bike.
Change defective parts
Here, we'll outline how to repair three of the major components of the electric bike: the battery, motor, and tyres.
- Battery
When you notice that the pedal assist or the display doesn't work, you should check your battery first to ensure it can work normally or not.

If the control panel's LEDs cannot light up, the battery may be uncharged, so you need to charge it first. You should check the charging conditions by the battery's LED indicator before putting it back on your e-bike; one red and three green means it's fully charged. Another fully charged signal is the battery status on display shows one red +one orange +three white when you turn it on.
If your battery cannot change, you should ensure the charger is the correct plugin and press the power button after 6 hours of charging; if three LEDs turn green, it's fully charged. If only two green, you should charge for a longer time. If no LED indicators light, you might check the voltage.
If the e-bike computer display still doesn't work, you should check the voltage of the batteries with a voltage meter or multimeter. The normal value is around 40V; if the value flashes or displays at a quite low value, you should change to a new battery.
If your bike has been parked for a long time in your garage without recharging and loses power too quickly once you recharge it, your bike's battery is likely defective and will need replacing.
When charging your bike, we strongly advise against leaving the battery charger connected to your electric bike for longer than 12 hours. Only 6-8 hours are enough to get it fully charged. Overcharging can damage a battery in the long run, so doing this reduces the chances of it.
Eskute e-bikes have a one-year warranty; if your battery fails within a year, please get in touch with us to get a new e-bike battery.
- Motor

One of the most important parts of your bicycle is the motor. If your e-bike's motor fails, you lose out on all the benefits, and the bike becomes a regular bike.
If you cannot feel the pedal assistant when climbing the slope as usual, maybe you should check the motor.
To inspect the motor, remove the bike's cover and access the engine.
Remember, you'll need the nuts and bolts later, so store them safely. Then, remove the motor cover with an Allen wrench.
Next, place a board at your workstation to provide more support when prying the cover open. Then, hold the wheel above the wood board with the non-wire side facing down and force the wheel's axle onto the wooden platform.
After prying the bike's cover to access the motor, inspect the motor for any damage, such as disconnected or worn-out cables, burned parts, etc.
Then, replace the damaged parts with a replacement from the Eskute store or any other reputable store. Now, it's time to connect the machine after you finish repairing it. Reverse the process and screw in all the bolts and screws you saved.
- Tyres

Tyre issues are easy to find; having a flat tyre is one of the most common bike tyre issues. The first step to repairing a flat tyre is finding and purchasing the correct tube size.
Your bike tyres should have a number engraved on the exterior. Then, look for a tube that fits this specification (this information should be noted on the tube's package.)
Additionally, you must determine whether your new tube requires a Schrader or Presta valve. Presta valves are long, slender valves typically used on road and mountain bikes. On the other hand, a Schrader valve is shorter in length and thicker.
Afterwards, you can remove the wheel once you've bought the appropriate replacement tube. Tyre levers will come in handy when removing the tyre from the wheel. You can remove the tyre bead by positioning the wheel to press the lever below the bead and around the perimeter.
Then, repeat this process on the other wheel. Afterwards, inspect the inside of the tyre for any objects that punctured your bike's tyre and remove them. After examining the tyre, it's time to reinstall the wheel.
Now, unpackage the tube and insert it into the tyre's side. Do the same for the other tyre, and voila! You will have successfully repaired your bike's tyres.
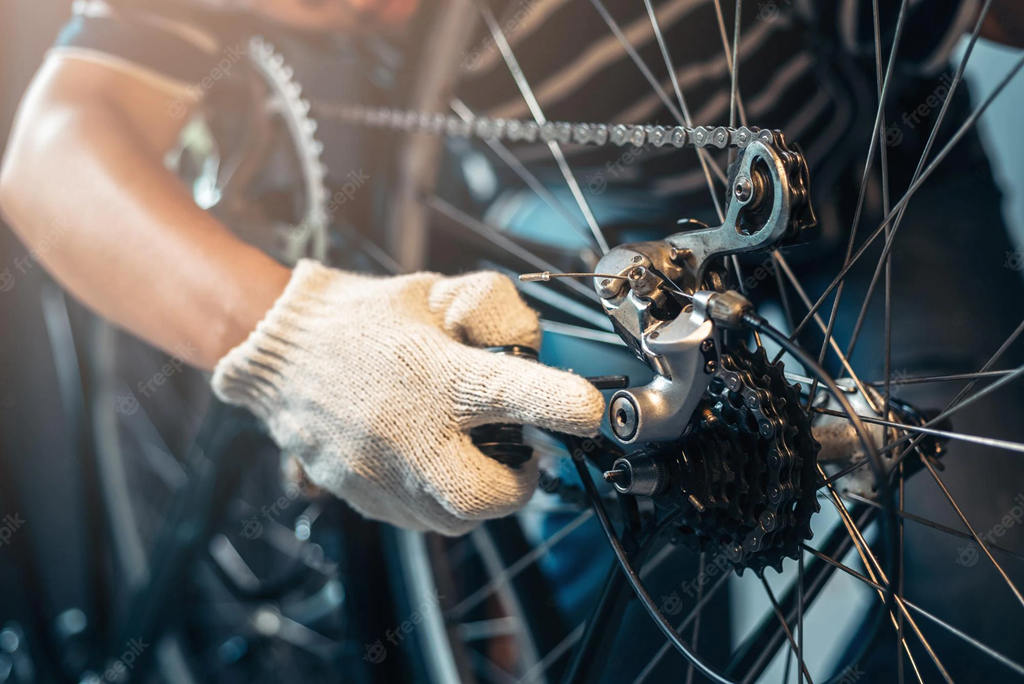
- Chains

Several riders have expressed that they've experienced their bike chain skipping after extended use. This issue is common, and we'll discuss how to fix it if it happens to you.
Once your bike is parked, pedal it manually while carefully adjusting the gears. Make sure your chain is on one of the largest front rings and the smallest rear rings. By doing this, you'll be able to ascertain the chain and replace it.
The next step is to inspect the derailleur's rear and search for the barrel adjuster to adjust the bike chain. If the skipping persists, find the limiting screw on top of the derailleur. If this screw is too tight, the chain won't shift to the smallest ring, causing your bike's chain to skip. So, try to unlock the limiting screw to increase the chain's range of motion.
The lifespan of electric bikes
The overall lifespan of an ebike depends on the condition of its components. First, the battery is perhaps the most crucial part of an e-bike. Electric bikes typically use lithium-ion batteries to power the bike.
Batteries typically degrade over time, even when you're not using the bike. With proper care, your bike's battery will last for between three and five years before you experience a noticeable downgrade in performance.
Remember, electric bikes are heavier and ride considerably faster than regular bicycles. As a result, the brake pads will wear out more quickly, so you'll need to change them often. If you hear a grinding noise, you must replace the brake pads.
On average, high-quality brakes last up to about 3,000 to 5,000 miles. So, you can study your bike's mileage to gauge when it's probably time to change the brakes. Finally, you can expect your bike's tyres to last longer than most of the electric bike's components. So, inspect your tyres regularly to guarantee they are in good condition.

Keep your bike in tip-top condition with regular service.
Riding an ebike has many advantages: it's fun, convenient, and often faster than the traditional bike. In order to keep your bike in good shape for a long time, it is important to carry out periodic maintenance. Regularly inspect the brake pads, spokes, and tyres. If you cannot fix the problem home, take your bicycle to a certified professional.
Should you need more help, check our help centre to learn more about servicing and maintaining your bike.


22 comments
James Pack
I have a Eskute M200f, the battery and display Powers up the light works the horn works but on the display there is a red square with an m in it and I can turn the throttle and I have nothing. How do I reset this bike to factory specs?
Patricia Haines
Hi
I purchased x2 electric pollutant pro from yourselves and one of the battery’s is completely dead and not charging at all , it shows no green lights ,this bike has only completed 500 km and is regularly serviced and charged ,I understand I am out of warrently nut surely the battery life should last longer ,what do you suggest can you replace the battery myself being a loyal customer also purchasing lots of accessories as well as recommending your company to many friends and co motorhome enthusiasts .
Yours sincerely
Patricia Haines
Mob 07900623378
Bob
My display won’t turn on at all and I can’t ride my bike now but the battery is fully charged but idk what to do
Peter Haughian
Problem started with a creaking noise so i removed the pedal and bottom crank on one side and greased it and re-fitted them back onto the bike. Today went out for a ride and there was no assist at all, however the push assist does work. Any help would be great.
I can send you some pictures of the damaged cable
David Mills
How do you disconnect the motor on a netuno plus e bike in order to remove the rear wheel to be able to change tyre please
Leave a comment
This site is protected by hCaptcha and the hCaptcha Privacy Policy and Terms of Service apply.